


The atPlatform Flutter Demo Apps Revealed: at_hello_world
Visit atsign.dev for a deeper dive into the atPlatform!


Abstract
If you’ve ever dabbled with the atPlatform or its atProtocol, you’ve probably found yourself examining the sample Flutter applications we’ve provided in the at_demos repository of our Github. While we’ve done our best to make the demo apps digestible with sample GIFs and in-depth README files, those who’ve just begun their atPlatform journey are likely still scratching their heads. As someone who’s helped create and refactor the existing gallery of demo apps, I hope to shed some light on the various functionalities of these applications to give you a stronger understanding of the atPlatform’s vast capabilities. Today, let’s dive into the at_hello_world application.
at_hello_world
The at_hello_world application is a bit of a misnomer. Beyond the fact that this app does a lot more than printing “Hello World!” on the console of your IDE, if you lift its hood, you’ll find a tremendous amount of stuff happening from various rounds of encryption to persisting data on a remote secondary server. The developer by no means has to understand everything that is happening behind the scenes in the at_hello_world application, but it’ll definitely help to grasp the basics.
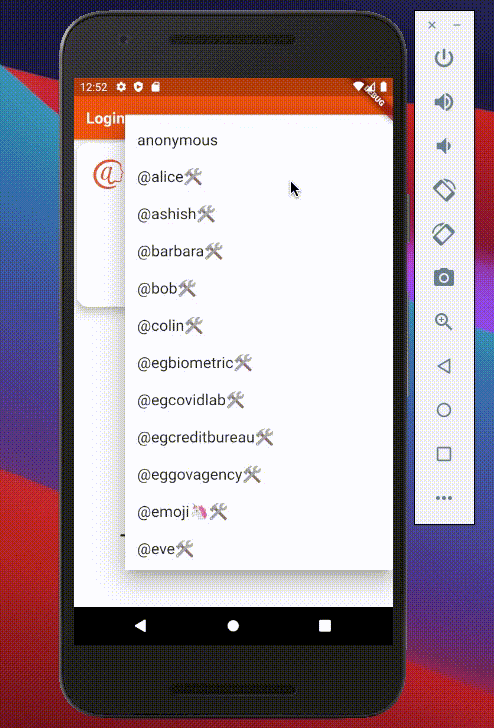
Let’s begin by navigating through the intended user journey of the at_hello_world app. Arriving at the login screen, you select one of the testable atSigns from the dropdown menu and click the “Log In” button. Assuming that your virtual environment and emulator are working, the loading screen should lead to the home page. The “Home” screen of this application lets you scan, add, and look up key/value pairs that will persist so long as you don’t restart the virtual environment. At a glance, nothing too complicated.
Once we check out the code, however, several questions start to arise. Why are we using two authentication methods in the login function? What even is the point of a testable atSign? To dissect all of this, let’s first direct our attention to the login function:
 _login() async {
    if (atSign != null) {
      FocusScope.of(context).unfocus();
      setState(() {
        showSpinner = true;
      });
      String jsonData = _serverDemoService.encryptKeyPairs(atSign);
      _serverDemoService.onboard(atsign: atSign).then((value) async {
        Navigator.pushReplacementNamed(
          context,
          HomeScreen.id,
          arguments: atSign,
        );
      }).catchError((error) async {
        await _serverDemoService.authenticate(
          atSign,
          jsonData: jsonData,
          decryptKey: at_demo_data.aesKeyMap[atSign],
        );
        Navigator.pushReplacementNamed(
          context,
          HomeScreen.id,
          arguments: atSign,
        );
      });
    }
  }
Going from top to bottom, our program tries to run the “onboard” method first. Taking an “atsign” string as an optional parameter, the onboard method searches for encryption keys in the device’s keychain manager to authenticate into the secondary server corresponding to the individual’s atSign. By authenticating, the individual can now freely access and share the information held in their secondary server with the assurance that no one else can infringe on their data. Assuming we onboard successfully, the program pushes the Navigator (a native Flutter class) to the home screen. You may be wondering, “Well, what if there aren’t any keys in the keychain manager?” In this scenario, a “Private Key not found” exception will be thrown and an error will be produced inevitably. To prevent the program from terminating, we add the “onError” method and call “authenticate” (the slightly dorkier one of the onboard/authenticate twins). Put concisely, our version of authenticate will encrypt the necessary private keys that we need for future instances of logging in (i.e. calls to onboard), put them in the keychain manager, and push the Navigator into the home screen. Now that we’ve logged into the secondary server of the selected testable atSign, the individual can now perform many actions that would have resulted in numerous exceptions (i.e. inadequate permission) had we just started from the home page. For this particular app, the verbs we can use are “update”, “scan”, and “lookup.”
_update() async {
    if (_key != null && _value != null) {
      AtKey pair = AtKey();
      pair.key = _key;
      pair.sharedWith = widget.atSign;
      await _serverDemoService.put(pair, _value);
    }
  }

  _scan() async {
    List<AtKey> response = await _serverDemoService.getAtKeys(
      sharedBy: widget.atSign,
    );
    if (response.length > 0) {
      List<String> scanList = response.map((atKey) => atKey.key).toList();
      setState(() => _scanItems = scanList);
    }
  }

  _lookup() async {
    if (_lookupKey != null) {
      AtKey lookup = AtKey();
      lookup.key = _lookupKey;
      lookup.sharedWith = widget.atSign;
      String response = await _serverDemoService.get(lookup);
      if (response != null) {
        setState(() => _lookupValue = response);
      }
    }
  }
If you look at these verbs long enough, you may begin to realize that the @platform, at its core, is an infrastructure based on key/value pairs. At the top of every single verb, we are either initializing or retrieving objects called AtKeys, which belong to an atPlatform-specific class that provide several useful attributes you can play with (the most common one being the String “key” attribute). Once you’ve filled out the necessary attributes of an AtKey instance, you can pair this with a corresponding “value” string to call important methods like “put” (which puts a key/value pair into an atSign’s secondary server) and “get” (you can probably guess what this does). These methods, as well as the “getAtKeys” method we called in the _scan function, all come from an instance of our service class (called server_demo_service in the at_hello_world app), which you can think of as a helper class that allows us to use the atPlatform more easily.
Once you have a good understanding of the login, update, scan, and lookup verbs, you can create just about any personal application that does not require sophisticated functions like real-time notifications or file transfers (we do have demo apps with these capabilities, however!). The atPlatform is intended to serve as a terrifically simple SDK for your Flutter apps; give it a try to enhance your app development experience!